
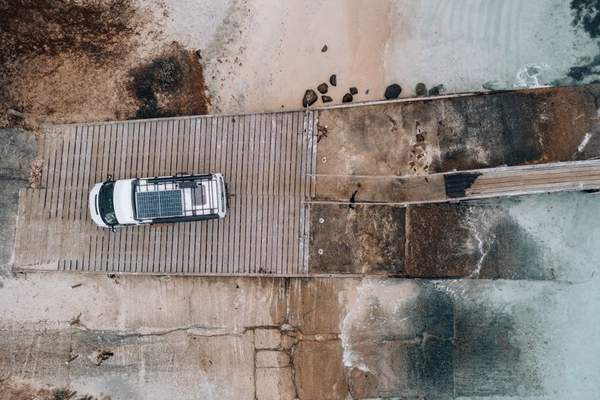
What should a solar panel kit van setup include?
A solar panel kit van setup should include panels sized to your daily energy use, a suitable leisure battery, a compatible charge controller, correctly rated cable and protection, secure roof fixings and basic monitoring. Size it from watt-hours used, roof space and weak-weather charging, not simply the wattage printed on a boxed kit.
A van solar system works as one chain: loads set the energy demand, the battery stores it, and the array and controller replace it. Start with measured use and the physical roof rather than forcing the numbers to fit after buying.
What should a solar panel kit van setup include?
A complete setup needs generation, storage, charge control, protection, mounting hardware and monitoring. Every part must suit the battery voltage and maximum current.
- Solar panels: Choose total wattage from the energy you need to replace each day and the unshaded roof area available. Vents, aerials, rails and pop-top sections can remove space.
- Leisure battery: Size storage in usable watt-hours, not amp-hours alone. Chemistry, permitted depth of discharge and maximum charge current affect what the battery can safely deliver and accept.
- Solar charge controller: Match it to array voltage, current and battery type. Check both maximum solar input voltage and charging-current rating.
- Cable and protection: Cable size must suit current, route length and voltage drop, while fuses or breakers must follow the equipment manufacturer’s instructions. A 12 V battery can supply very high fault current.
- Roof fixings and cable entry: Use mounts that suit the panel frame and van roof, while allowing for vibration, water sealing, airflow and inspection.
- Monitoring: A controller display or battery monitor shows charging, battery state and daily harvest. That makes poor generation easier to distinguish from unexpectedly high consumption.
The broader solar panel kit guide covers the parts themselves. A camper van solar panel kit or 12v solar panel kit can help with layout and voltage choices, but the specification still has to match your loads.
A ready-made van solar panel kit can simplify buying, but check each cable, fuse, controller and mounting part against your own roof and battery rather than assuming the box is suitable.
How do you size solar panels for a van battery?
Start with the energy your van uses in a normal day, measured in watt-hours, then work backwards to panel wattage and battery storage. Add your real loads, include a reserve and check whether the panel area will fit without repeated shading.
For example, a 40 W fridge averaging 8 hours of compressor run time uses 320 Wh. Add a 12 W light for 4 hours at 48 Wh and a 65 W laptop charger for 2 hours at 130 Wh, and those three loads total 498 Wh before phones, pumps or inverter losses.
If you plan around 600 Wh per day and use 3 equivalent full-sun hours as an assumption, 600 Wh divided by 3 hours gives 200 W before losses, heat, shading and imperfect panel angle. A solar panel kit for van use labelled 200 W therefore does not promise 600 Wh every day.
A nominal 12 V, 100 Ah battery represents 1,200 Wh because 12 V multiplied by 100 Ah equals 1,200 Wh, but usable capacity depends on the battery maker’s limits and the reserve you keep.
The site’s cost rule uses the same arithmetic. A 60 W appliance used for 5 hours is 60 W divided by 1,000, multiplied by 5 hours, which equals 0.3 kWh. At 24.5p/kWh for the July 2026 cap period, 0.3 kWh multiplied by 24.5p/kWh is 7.35p for that 5-hour use. Replace the wattage, hours and unit rate with your own figures.
What controller rating is needed for a van solar kit?
The controller must accept the array’s maximum voltage and current while charging the battery within the manufacturer’s limits. Check the solar-input voltage ceiling, charging-current rating and supported battery voltage before choosing it.
A quick current estimate is panel watts divided by charging voltage. A 400 W array divided by 14.4 V is about 27.8 A, so a controller rated at exactly 28 A leaves virtually no headroom; the correct size above that depends on the controller maker’s instructions and the panel wiring.
Panel open-circuit voltage can be higher than ordinary charging voltage, especially in colder conditions, so the controller’s absolute input limit must not be exceeded. If alternator or mains charging can run at the same time, also check the total charging current the battery may receive.
How should panels be mounted on a van roof?
Panels should remain secure at road speed, resist vibration and water ingress, and stay accessible for inspection. Roof material, ribs, vents, rails, aerials and vehicle requirements all affect the fixing method.
A tidy photograph is not proof of a sound installation. Low-profile panels can still have poor airflow, awkward cable routes or fixing points that cannot be checked later.
- Keep panels clear of roof furniture that creates repeated shadows.
- Use mounting hardware compatible with the panel frame and roof material.
- Plan the cable entry so the seal can be inspected and renewed.
- Keep cables away from sharp edges, hot surfaces and moving mechanisms.
- Check whether drilling or bonding affects a vehicle or conversion warranty.
- Leave access to inspect brackets, glands, connectors and damaged cable.
A rented, leased or financed van may restrict permanent alterations, so check the agreement before drilling or bonding. If you are uncertain about structural fixing, watertightness, cable sizing or high-current DC protection, use a competent vehicle-conversion or auto-electrical professional.
How do you estimate daily charging in poor weather?
Estimate weak-weather charging from panel wattage multiplied by realistic equivalent sun hours, then reduce the result for losses and shading. Do not treat the laboratory wattage on a panel as an all-day energy figure.
For example, a 300 W array with 1.5 equivalent full-sun hours gives 450 Wh before losses. Applying a conservative 70% planning factor gives 315 Wh for the day; that 70% is an assumption, not a guaranteed UK winter yield.
If your van uses 600 Wh in a day and the panels repeatedly harvest 300 Wh, the battery loses roughly 300 Wh of stored energy each day until another charging source replaces the deficit. Record daily harvest, battery state and large loads so your own history becomes more useful than a generic seasonal claim.
Alternator charging or campsite hook-up may therefore be part of a dependable system. A solar panel van kit is a source of energy, not a guarantee that the battery will return to full every day in shade or short winter daylight.
When does a van solar setup not work as planned?
A van solar setup does not work well when the roof, parking pattern and energy demand contradict the neat layout shown in product photographs. A roof crowded by a skylight, vents, aerials, roof bars or a pop-top may leave too little unshaded area for the panel wattage your calculation requires. Regular parking under trees cuts harvest further, while a fridge, inverter load, heater fan or repeated laptop charging can drain a modest battery faster than dull-weather solar replaces it.
Some ideas only work in a photograph: panels squeezed around roof furniture with no inspection access, cable glands hidden where leaks cannot be spotted, or a battery chosen because the amp-hour figure looks impressive without checking usable watt-hours. A rented, leased or financed van can stop the plan if drilling, bonding or electrical alterations breach the agreement or warranty. If measured use shows a daily deficit in the conditions you actually travel in, changing the badge on the panel will not fix the mismatch; you need lower demand, more generation, more storage or another charging source.
Frequently asked questions
Is one solar panel enough for a van?
It can be if daily energy use is low enough and the panel can replace that energy in the conditions in which you travel. Judge it by watt-hours used and realistic daily harvest, not panel count alone.
Should a van solar system use 12 V or 24 V?
Either voltage can work, but the battery, controller, inverter and loads must suit the system or use suitable conversion equipment. Higher voltage can reduce current, but it is not automatically best for every van.
Can flexible solar panels be fitted to a van roof?
They can be, provided the panel and mounting method suit the roof and the manufacturer’s instructions are followed. Consider heat, surface preparation, cable routing and whether the panel can later be inspected or removed without damaging the roof.
Do I need a fuse between the controller and battery?
Battery-side protection is commonly required because a battery can supply very high fault current. Follow the controller and battery manufacturers’ instructions for fuse type, rating, cable size and placement rather than copying a generic layout.
Can I add more panels later?
Usually, but only if the controller, cabling, roof space and battery charging limits can accept the larger array. Recalculate array voltage and current before adding panels, especially if the wiring arrangement changes.
A reliable solar panel kit van design starts with measured daily loads, then matches storage, panel capacity, controller limits, protection and roof space to those numbers. Allow for weak weather and real installation constraints so performance changes are easier to diagnose.